Showing posts with label Template. Show all posts

Hide or Remove Navbar in Blogger

The Blogger or Blogspot Navbar is a default feature that appears at the top of every Blogger powered blog. It is a useful navigation tool which allows readers to search the blog for targeted content, mark the blog as objectionable, and randomly view other member blogs.

Hide or Remove Navbar in Blogger

The Navbar can be disabled for users who publish contents via FTP, but it will appear on all freely hosted BlogSpot blogs. While the feature is undeniably useful, some people find that its position at the top of the page looks obtrusive even with a choice of 4 colors. Some therefore pick a template with a black background to blend well with a black navigation bar. There are also parents and educators who find the 'view random blogs' feature inappropriate, as their children may inadvertently view objectionable blogs.

Nevertheless, this article is not a discussion on the merits or demerits of a Navbar. That is for you to decide. Here, I am assuming that you have made a conscious decision to hide or remove the Navbar. Having so decided, this is the guide on how you can do it.

Log into your dashboard, go to Template -> Edit HTML. Scroll to anywhere on the template and insert the following CSS style definition in red within the head section.


#navbar-iframe {
display: none;
}
</head>


Preview the template. You will notice that the Navbar is no longer displayed, and (depending on your template) your contents might shift upwards to take up the space reserved for the Navbar.

[Update:

This code display:none no longer works. Those who have used this may want to try out the other 2 methods (height and visibility) instead.]

Now, try this style definition:-


#navbar-iframe {
height: 0px;
}


This will reduce the Navbar height to zero, effectively removing the Navbar. You can also explore this other style:-


#navbar-iframe {
visibility: hidden;
}


You will notice that your contents do not shift upwards. The space is still reserved for the Navbar, but the Navbar is now hidden and not visible.

Either one of the above codes would do. You can also combine them if you'd like. For example, giving a numerical value for the height of the Navbar and hiding the visibility will give you a margin at the top and yet without the Navbar. Choose one that best fits your blog design. If you change your mind in future, and wish to have back your Navbar, simply remove the style definition.

Search Box

If you decide to remove the Navbar. This is one of the great features in the Blogger Navbar.

Read more >>

Difference - HTML and XHTML

When inserting codes into the Blogger template, page element, or blog post, you may have seen error messages that the code could not be parsed, was not well-formed, was broken, or that the elements were not closed properly. These errors can be corrected if you understand the rules that must be adhered to in XHTML documents. Blogger templates use the XHTML 1.0 Strict Document Type. In this article, we shall explain some of the XHTML syntax or rules, so that you may troubleshoot and resolve the problems if these error messages should occur.

XML, HTML and XHTML

We shall keep this short. Just so as you understand what we said about document type, view the Page Source or Source of your Blogger blog. You should see this document type declaration at the very top:-

<!DOCTYPE html PUBLIC "-//W3C//DTD XHTML 1.0 Strict//EN" "http://www.w3.org/TR/xhtml1/DTD/xhtml1-strict.dtd">


The terms – XML, HTML and XHTML - refer to the markup language used to write the web pages. Many of us would have heard of HTML (Hypertext Markup Language), invented by Tim Berners-Lee, and used since the early days of internet. XML (Extensible Markup Language) is a meta-language, used to create other markup languages. The traditional HTML was later recast to use the rules of XML and that resulted in a new XML application, called XHTML (Extensible Hypertext Markup Language). Because XHTML rules are strict and unforgiving, not conforming to them when attempting to modify the template would result in error messages. So, what are these rules that Bloggers like us should take note of?

Basic Rules of XHTML

1. Codes to be in lowercase

Since XML is case sensitive, all the element keywords and attribute names used in XHTML should be in the lowercase. For example, the template code is not this:-

<TITLE>FEQS-Frequently Encountered Questions</TITLE>


but this:-

<title>FEQS-Frequently Encountered Questions</title>


If you have noticed, the elements and attribute names between the lesser than (<) and greater than (>) signs have to be in the lowercase. However, the value, which in this case is “FEQS-Frequently Encountered Questions”, can be in the uppercase, lowercase, or mixed case.

2. Attribute values to be in quotation marks

All the attribute values have to be enclosed either in single or double quotation marks. The following examples are not accepted by XHTML:-

<div id=header-wrapper>

<a href=http://feqs.blogspot.com>Text Link</a>

<img src=photo.jpg/>

<table width=200 border=0 cellpadding=2>


Instead, they should be written as such:-

<div id='header-wrapper'>

<a href="http://feqs.blogspot.com">Text Link</a>

<img src="photo.jpg"/>

<table width="200" border="0" cellpadding="2">


3. Container elements must have closing tags

This is not correct:-

<p>A paragraph.


In XHTML, there must be a closing tag with a forward slash (/) at the end:-

<p>A paragraph.</p>


Examples of the many non-empty elements that have opening and corresponding closing tags are:-

<ul> ... </ul>
<li> ... </li>
<table> ... </table>
<h2> ... </h2>
<div> ... </div>
<span> ... </span>
<dt> ... </dt>
<dd> ... </dd>
<a href> ... </a>


4. Standalone elements to be closed

Some of the elements are empty or standalone. They do not have associated closing tags. Common examples are:-

<br>
<img>
<input>
<frame>
<hr>
<meta>
<link>


Nonetheless, in XHTML, these elements must be terminated or closed. There are two ways to do that. One way to terminate the element is to put a forward slash (/) at the end like this:-

<br/>
<img/>
<input/>
<frame/>
<hr/>
<meta/>
<link/>


The second way is to add a corresponding closing tag like this:-

<br> ... </br>
<img> ... </img>
<input> ... </input>
<frame> ... </frame>
<hr> ... </hr>
<meta> ... </meta>
<link> ... </link>


5. Elements to be properly nested

This means that elements must be closed in the reverse order. For example, this code is not accepted in XHTML:-

<form><table> ... </form></table>


It is improperly nested because the form was created first followed by the table. To close them in the proper order, the table must be closed before the form, like this:-

<form><table> ... </table></form>


6. Document to have only one root element

In the XHTML document, you will see that except for the document type declaration, all the codes are nested between <html> and </html>. This is the root element and all other elements or sub elements are in between. The document structure will look like this:-

<html>
<head> ... </head>
<body> ... </body>
</html>


7. Attribute minimization is not allowed

In XHTML, all attributes should be in the form name="value". Even if the value is the same as the name, it cannot be minimized to one word. Hence the textarea code is not this:-

<textarea readonly>Hyperlink Code</textarea>


but this:-

<textarea readonly="readonly">Hyperlink Code</textarea>


XHTML Character Entities

Quite a number of readers had asked why they were unable to display HTML codes in their blog posts or why their codes were not well-parsed when inserted into the template. If you have noticed by now, the codes are wrapped in the lesser than (<) and greater than (>) signs. The moment these are posted, they will be interpreted as codes and will trigger an action by the browser. Should you want to display these as part of the text, use their character entities instead.

"&quot;
&&amp;
<&lt;
>&gt;


The next time you see an error message to the effect that the code is not well formed, not well parsed, not properly closed, etc., take a look at this guide, troubleshoot the problem and try out the possible solutions.

Read more >>

Background Image for Blogger Template

With this guide, you would be able to add a background image or picture to your Blog, customize the position of your image, and have a static background image that stays in place when you scroll through the contents of your blog.

You will need to create an image. Find a picture you like. If you need a free photo editing tool, you can either search the net for one or use Google's Photo Editing Software Picasa. You can also use a small tile-size image which can be repeated so as to cover the entire page. Try not to have an image file that is too large as your page may take a little longer to load.

After creating a picture, you will need to upload it onto a free picture host.Next, log in to your dashboard layout; under Template -> Edit HTML, scroll to where you see this:-

body {
background:$bgcolor;


Change background color

If you would like to change the background color of your blog to a very unique color, you can manually specify the color value. take a look at the HTML Color Chart to see if you can find your desired color. For example, if you have chosen a color code #B38481, change the above code to this:-

body {
background-color:#B38481;


If you are changing the background color of your sidebar only, add the color code under the relevant sidebar heading.

#sidebar-wrapper {
background-color:#B38481;


Similarly, if you want a different color for your main post column, add the color code as follows:-

#main-wrapper {
background-color:#B38481;


Note that different templates may label their stylesheets differently. The #sidebar-wrapper may be called #side-wrap or something to that effect.

In some templates like the TicTac Template, the background color you see is due to a background image and inserting a color code into the template will not help. To have a different color, this background image will have to be edited. For more details, read the article on Background Color of TicTac Template.

Add a background image

The code to insert is this:-

body {
background-image: url(URL address of your image);


Remember to insert the URL address of your image in the brackets.

Insert the URL of this test image into the above brackets and Preview your blog.

You can also have a background image just for your sidebar. Locate the style and add the background image code accordingly.

#sidebar-wrapper {
background-image: url(URL address of your image);


For a background image to your main post body only, add the code here:-

#main-wrapper {
background-image: url(URL address of your image);


Repeat background image

By default, the image is repeated to fill up the entire background of the page. If you have a small or tile-sized image, it will appear like a print pattern in the background. Sometimes, you may choose not to have the image repeated. If that is the case, you can insert this code:-

background-repeat: no-repeat;


Alternatively, you may only want the image to be repeated horizontally. The code is this:-

background-repeat: repeat-x;


To have the image repeated vertically, the code is this:-

background-repeat: repeat-y;


Position background image

If you have an image that is not repeated, you may like to specify the exact position of this image on your page. The HTML code to be inserted is this:-

background-position: top left;


Your image will appear at the top left corner of your page. The other possible values that you can use to replace “top left” are:-

top center;
top right;
center left;
center center;
center right;
bottom left;
bottom center;
bottom right;

If you do not want it entirely left, right or center, you can also define the horizontal and vertical alignments either in percentage or in pixels. Use either of these values instead, with x being the horizontal value and y being the vertical value.

x% y%;
xpx ypx;

Static background image

After that, you may specify whether you want your background image to remain in a fixed position when the contents of your blog are scrolled. By default, the picture scrolls with your content. To have it stay put, the code to insert is this:-

background-attachment: fixed;


Putting it all together

The eventual CSS code that you will have for your customized template may look like this:-

body {
background-color:#B38481;
background-image: url(http://i154.photobucket.com/albums/s255/ownlblog/narutosasuke1024x768.jpg);
background-repeat: no-repeat;
background-position: center center;
background-attachment: fixed;


You can also combine the attributes into one line and the shorthand code will look like this:-

body {
background:#B38481 url(http://i154.photobucket.com/albums/s255/ownlblog/narutosasuke1024x768.jpg) no-repeat center center fixed;


Putting the above code into my blog, this is what you would see.

Background Image for Blogger Template

Of course, after having added the background image, you will need to adjust the colors of your text so that they stand out against the backdrop. Go to Template -> Fonts and Colors to do that.

This guide will give you an image background to your Blog. Sometimes, you may have several images, all of which are suitable for your Blog.


Read more >>

Animated Banner with Rotating Headlines

This article is about creating a nice looking banner that incorporates rotating headlines of your 5 recent Blog articles. It is nothing more than a picture to represent your Blog.

Nonetheless, a nicely designed banner can attract more visitors and add a touch of professionalism to your Blog. I am not a graphic designer and I believe you can produce much nicer pictures. There are also GIF animator softwares on the net which will help you create a moving image, blinking text, and so on. What I intend to do here is to share with you alternative ideas on how you can create your own unique animated banner.

Look at this example I made for my other blog. Notice how the titles of the 5 recent posts, taken from the site's feed, are rotated in the banner. Instead of a plain image, the headline animation adds life and attracts readers who want to read the details of your articles to click the banner.

Famous Motivational and Inspirational Quotes

This is done through a popular feed aggregator service called Feedburner. If you do not have an account with them, go to their main page, type in your Blog URL and follow their instructions to create a free account. Even if you have subscribed to other feed services like Feedblitz, there is no harm having more service providers publicize your Blog for free.

Once you have successfully created an account, you can browse through their services and tools to pick the ones that you like. Here, we shall talk only about their Headline animator. Go to “Publicize” tab and “Headline Animator” to create a new animated banner.

Tips for New Bloggers

The instructions given by Feedburner are pretty simple to follow. The first thing you need to do is to pick a “theme” which can be their standard black and white backgrounds, or their dynamic and seasonal images. If you merely want to test the outcome, pick any of the schemes. The normal banner size is 468px x 60px and you may want to use this for a start. After that, choose the colors, font size, and position the title, date and headline. Click “Activate” when you are done. They will generate a HTML code for you to copy and paste into your template.

Tips for New Bloggers

While this may give you a banner that contains the headlines of your posts, it does not give you a unique identity. If you have the time, you should try to create your own banner image. For instance, if you have a nice picture that you like, crop it or resize it to 468px x 60px using a photo editing software. If you don't have one, you may try Google's Picasa or search the net for other free softwares. If possible, leave a clear background somewhere for the date and headline. Save the image in the .gif (not .jpg) format. A background image can look like these.

Business Fables and Management Lessons

Business Fables and Management Lessons

The image will have to be uploaded onto an image host. There are a number of free hosts available on the net.After uploading the image file, take note of the image URL.

Go back to Feedburner's “Publicize” tab. This time, under the “Theme” select “Provide your own background”. You will be prompted to enter the “Image URL”. Again, you can adjust the positions of the title, date and headline by dragging them to the desired positions. Click “Activate” once you are satisfied with the layout and obtain the generated HTML code.

Business Fables and Management Lessons

Log in to your Dashboard, go to Template ->Page Elements -> Add a Page Element and choose “HTML/JavaScript”. Copy the generated HTML code, paste and save. If you want to use this banner for publicizing your Blog in blog directories or advertisements, your new animated banner URL is your Feedburner feed address with a .gif extension. If you are still unsure, the banner URL for this site is:-

http://feeds.feedburner.com/KP.gif

The portion in red is my feed address. If I enter the above banner URL, I will get this image:-

KP

Read more >>

Add Scrollbars to Blog Widgets

This tutorial shows you how to create widgets or boxes with scrollbars. When the contents in the widget exceed a certain specified height or width, there will be a vertical or horizontal scrollbar to enable users to read the contents that overflow or exceed the box area. This scrolling element is especially useful for our Link List or Labels widget which may be very lengthy. It reduces the total height of the widget and yet allows readers the option of scrolling through and viewing the entire content. We shall discuss how to customize the template design to include the scrollbars and the various modifications that can be made to the stylesheet.

The “overflow” style property

Let us first explain what the code is about. We use the “overflow” property to create the scrollbars in CSS or the stylesheet. There are several values that can be assigned to it, although not all are useful for our purposes.

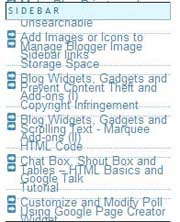
1. overflow:visible

This is the default value. The extra content is either rendered outside the box or the length of the box is extended to include the extra content. Don't bother to use this in Blogger blogs because you will see the contents of the widgets overlapped like this:-
Add Scrollbars to Blog Widgets

2. overflow:hidden

This will cut off the extra content that overflows and there will be no scrollbar to the box. It doesn't serve our purpose as well.

Add Scrollbars to Blog Widgets

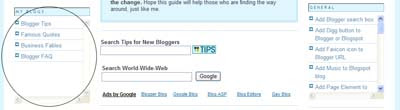
3. overflow:scroll

The content is clipped but there will be scrollbars at the sides.
Add Scrollbars to Blog Widgets

4. overflow:auto

We like this attribute. Basically, it tells the browser to display a scrollbar only when necessary i.e., when the content overflows the width and height settings.

Add Scrollbars to Blog Widgets

Scrollbar in All Widgets

Now that we know what the code does, we can apply it to our template. If we have many widgets in our sidebar, we can specify a fixed height for all the widgets. Carefully planned, our layout can look very neat since all the widgets will have the same height.

Login and go to Template -> Edit HTML. Insert this piece of code. For easy reference, we have added it under the /* Sidebar Content */ :-

/* Sidebar Content */
.sidebar .widget{
height:200px;
overflow:auto;
}


Add Scrollbars to Blog Widgets

In our example, we applied a height of 200px to the widgets. This can be changed to other values. Look at both sidebars. Notice the neatness and symmetry. Be careful though if you have AdSense Ads in the sidebars. It is against AdSense TOS to cut off the Ads and put scrollbars to their Ad Units.

Scrollbar in Widgets of One Sidebar

Let us assume for our discussion that you have modified your template to include an additional sidebar using our Three Column Template guides. We may have all the AdSense Ads in one sidebar and we want to add the scrollbars into the widgets of the other sidebar. The style that can be inserted into the template will be this:-

/* Sidebar Content */
#newsidebar .widget{
height:200px;
overflow:auto;
}


Or this:-

/* Sidebar Content */
#sidebar .widget{
height:200px;
overflow:auto;
}


depending on which sidebar your widgets are at. Preview the template and if it is what you want, save the Template and refresh your Blog.

Scrollbar in One Widget only

We can add the scrollbar only to one or several of the widgets. To do that, we must first know the ID of the widget. When we are at Template -> Edit HTML, scroll towards the bottom of the template code. You will see something like this:-

<div id='sidebar-wrapper'>
<b:section class='sidebar' id='sidebar' preferred='yes'>
<b:widget id='LinkList1' locked='false' title='General' type='LinkList'/>
<b:widget id='HTML1' locked='false' title='' type='HTML'/>
<b:widget id='Label1' locked='false' title='Label' type='Label'/>
</b:section>
</div>


In this example, we have added a Link List Page Element into our Sidebar and the ID for this widget is “Linklist1”. If we have more link lists, the IDs will be “Linklist2”, “Linklist3” and so on. Also, we have inserted a HTML/JavaScript Page Element and the ID is “HTML1”. The third widget we added is a Label list and the ID is “Label1”. Look at your template and identify the widget. Take note of the widget ID.

With the ID, we can now add the overflow property into the stylesheet under /* Sidebar Content */:-

/* Sidebar Content */
#Label1{
height:200px;
overflow:auto;
}


Add Scrollbars to Blog Widgets

This will add the scroll-bar to the Labels widget only without affecting the other widgets. Insert the relevant ID of your widget into the portion shown in red.

Scrollbar in All Widgets except One

A further variation is to add scrollbars to all the Widgets except one or two. As mentioned earlier, AdSense widgets should not have scrollbars and it might be your intention to have scrollbars in the rest of the widgets.

Follow the guide above to insert scrollbars into all the widgets. After that for the ones that you do not want scrollbars to appear, specify a bigger value for the height:-

/* Sidebar Content */
#AdSense1{
height:600px;
}


For example, if your AdSense unit is a 160x600 Vertical Wide Banner, put the height of the widget as 600px. Since the contents fit nicely into this size, the scrollbars should not appear. Change the widget ID accordingly to point to the widget that you want to exclude and adjust the height value.

Scrollbar for Links and Labels

We need scrollbars usually for Label lists and Blogrolls created using Link lists because these are usually lengthy. You may have noticed that using the above codes, the entire widget is included in the scroll. Supposing we want the title to remain static and have a scrollbar only for the links or labels, we can insert a code as follows (remember to enter the relevant ID into the part shown in red):-

/* Sidebar Content */
#LinkList1 ul{
height:200px;
overflow:auto;
}


Add Scrollbars to Blog Widgets

Scrollbar for Blog Posts

Should you want the scrollbars for each of your blog posts, scroll to where you see this code and add the portion (shown in red):-

.post {
height:200px;
overflow:auto;
}


Scrollbar for text within Blog Posts

Perhaps you might not want to have scrollbars for all the Blog Posts, but only for a piece of text within a Blog Post. You can follow the steps in this guide to insert scrollbars to text within the post.

Scrollbar for Long Text

If you have a long piece of text like those found in the usual Terms of Service, User Agreements, Rules, Privacy Policy, etc., scrollbars will be very useful in minimizing the text area and yet allowing readers to view the full contents.

Under Template -> Edit HTML, /* Sidebar Content */ , define a class as follows:-

.scrollingtext {
height:200px;
width:200px;
border:0;
overflow:auto;
}


What we have done is to specify that the text will be contained in a box with scrollbars automatically added if the text overflows the 200px x 200px area. The values of the border, height and width can be changed to suit your needs.

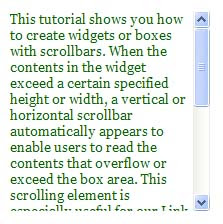
We can now type the text. This text can either appear in a Blog Post, or as an element in the Template. If it is in a Blog Post, after you have typed the TEXT in the Post Editor, switch to “Edit HTML” mode and insert these tags (shown in blue):-

<div class="scrollingtext">TEXT</div>


The TEXT can be inserted directly into the template via Template -> Page Elements -> Text. Similarly, if you have typed it in the rich editor mode, you can click the “Edit HTML” link at the top right corner and insert the above tags.

After publishing the post or saving the page element, you will be able to see the TEXT within a box and the scrollbars automatically inserted.
Add Scrollbars to Blog Widgets

Read more >>

Add Page Element to Blogger Header and Blog Posts

You would notice under Template -> Page Elements that there are options to add a Page Element to the sidebar and the footer. However, there is none for the Header and Blog Posts. Having a Page Element option to these latter two is useful. You may want to add a picture at the top, or a Google Adsense ad at the top or bottom of your blog posts.

To have an “Add a Page Element” option, under “Template”, click “Edit HTML”. Scroll down and towards the bottom, you will see these lines:-

<div id='header-wrapper'>
<b:section class='header' id='header' maxwidgets='1' showaddelement='no'>


Change them to this:-

<div id='header-wrapper'>
<b:section class='header' id='header' maxwidgets='3' showaddelement='yes'>


This will give you 2 more page elements that you can add to your Header. You can increase this number if you want.

Right after that are these lines:-

<div id='main-wrapper'>
<b:section class='main' id='main' showaddelement='no'>


Change them to this:-

<div id='main-wrapper'>
<b:section class='main' id='main' showaddelement='yes'>


You are now able to add Page Elements either before or after your Blog Posts.

Add Page Element to Blogger Header and Blog Posts

Note:

1. In different templates, the 'header-wrapper' may be called 'header-wrap' or 'header' and so on. Scroll to where you see an option called showaddelement and you can probably figure out the rest.

2. We realized that in some templates like the Dots Template, there is no separate Header at the top. Instead, the Header is contained in the left sidebar and the main posts appear on the right. This is the template layout and it is probably the reason for your choosing this design. In such templates, you can Add Page Elements to the 'main-wrapper' but not at the Header. Nevertheless, you can still look at the guidelines below to Add Page Elements in the 'crosscol-wrapper' part of the template. This will give you the option to Add Page Elements right on top of both the sidebar and main posts. You can upload images, insert AdSense code, text or other scripts into this section.

Update:

There is an additional position where you can add Page Elements to. This is between the Header and the Blog Posts. When you add a Page Element in the Header section, it follows the Header styles (like font, color and margin settings) and similarly, if you add a Page Element in the Blog Posts section, it follows the styles defined for the Blog Posts. You might want to include a Horizontal Menu or Navigation Bar or AdSense Ad unit just below the Header but before the Blog Posts and sidebars.

To do that, scroll to here and change to the value (shown in red):-

<div id='content-wrapper'>

<div id='crosscol-wrapper' style='text-align:center'>
<b:section class='crosscol' id='crosscol' showaddelement='yes'/>
</div>


This should appear in all new Blogger templates. If you don't see this in your template, you can also add the entire code (shown in green). When you view your Template -> Page Elements, you should now see a new section in between the Blog Header and Blog Posts where you can insert Page Elements.

Add Page Element to Blogger Header and Blog Posts

Once these are done, Save the Template. Click the “Page Elements” tab, and you will now see “Add a Page Element” option at the top of the Header and Blog Posts. Assuming you decide to add the element below the Header or Blog Posts, not to worry. Simply create whatever element you want and save. Next, drag and drop the element to the bottom of the Header or Blog Posts. Click the Save button at the top right hand corner of the page, and your settings have been saved.

Read more >>

Add or Remove Borders in CSS Templates

I have received a number of queries from people wanting to remove the image borders or add sidebar borders in the CSS layouts. In this article, we cover briefly what the border styles in CSS templates are and where you can find them. With this guide, you will be able to remove the borders around the images, sidebar or main posts, or change the style and color of the borders to match the Blog design.

The point to note is that some templates such as Scribe,TicTac and Thisaway use background images to create the look of the main post and sidebar sections. The 'borders' you see in these templates are the result of the background images. To change or remove the 'borders' around the main post and sidebar, the images will have to be altered and replaced. The sections in this article on CSS borders around Blog Posts or Sidebar will not apply to these templates.

Border Property

When you are logged into Blogger, go to Template -> Edit HTML and do a search (Ctrl+F) for the word “border”. You will see it appearing in a number of places in the template. In most of the stylesheets, the border settings are defined in one shorthand declaration like this:-

border:1px solid $bordercolor;


1. border

This is a shorthand setting for all the four borders. Instead of “border”, we may sometimes see “border-top”, “border-bottom”, “border-left” or “border-right” which sets a style specifically for that element's top, bottom, left or right border respectively.

2. border-width

There are three properties in the declaration. The first setting is the border width. It can be stated as a value in pixels like the example given or in general terms. The possible values are:-

1px (or any other length)
thin
medium
thick


3. border-style

The second setting in the shorthand declaration is the border style. Here, the possible styles are:-

none
hidden
dotted
solid
dashed
double
groove
ridge
inset
outset


You can see some of these styles in our following examples.

4. border-color

The final setting is the border color. If you see $bordercolor, it is a variable (“Border Color”) that you can change via Template -> Fonts and Colors. If you want a specific color for the border of an element, you can also change $bordercolor to a color code. Possible values are:-

#cc0000
rgb(204,0,0)


For a list of color codes, you may refer to our Color Code Chart.

Now that we understand what these styles are, we can proceed to customize our template. Go to Template -> Edit HTML and locate the border settings.

Border around Profile Image

Look for this line and if you do not want the border, change it to “0px”:-

.profile-img {
border: 0px solid $bordercolor;
}


or “none”:-

.profile-img {
border: none;
}


If you want a different style or color, amend the settings to one of the other possible values outlined above. For example, if we change the code to this:-

.profile-img {
border: 2px dashed #ff00ff;
}


Border around Images in Blog Posts

The border styles for the images in Blog Posts are found here:-

.post img {
border:1px solid $bordercolor;
}


Set it to “0px” or “none” to remove the image borders in the Blog Posts or customize the border style to something you like. Without a border, an image looks like this:-

Add or Remove Borders in CSS Templates

With a border style such as this:-

.post img {
border:3px outset #ff00ff;
}


The image is contained within a box:-

Add or Remove Borders in CSS Templates

If you post a lot of pictures and graphics on your Blog, you may like to spend some time configuring this and choosing an appropriate border setting.

Border around Image Links

In many of the templates, there is a style defined for image links. These are the clickable images which bring you to another webpage or URL when clicked.

You can customize the border settings of image links at:-

a img {
border:0;
}


Border around Images in Sidebar

In our Minima template, there is no unique style definition for images in the Sidebar. We can still set a special border style just for the images in the Sidebar, without affecting the border styles in our Blog Posts. Add into the stylesheet this code:-

.sidebar img {
border:6px ridge #ff00ff;
}


Border around Header

Many people upload images into the Blog Header and a border around the Header will stick out like a sore thumb. To remove the Header border, look for the border settings under any of these.

#header-wrapper
#header
#head-wrap
#head


Border around Blog Posts

To demarcate each post, instead of a line at the bottom, you can have a border around the entire Blog Post.

Add or Remove Borders in CSS Templates

Scroll to where you see this and change or insert the code (shown in red):-

.post {
border:1px dotted #ff00ff;
padding:1.5em;
}


We have included a padding to give some space between the contents and the border. Without this padding, the text will be too close to the border.

Border around Sidebar

Similarly, to add a distinctive border around the Sidebar, change or insert this code (shown in red):-

#sidebar-wrapper {
border:1px dotted #ff00ff;
padding:1.0em;
}


In some templates, you may insert the code under any of these:-

#sidebar-wrap
#sidebar

The padding adds a space between the Sidebar content and the border. Preview the template. If you find that the layout is affected because of the padding, reduce the margin between the Blog Posts and the Sidebar.

Add or Remove Borders in CSS Templates

Border around Footer

If your template has a Footer element, the border style can be found under:-

#footer {
border:1px solid $bordercolor;
}


Border around Entire Blog

If you wish to have a border surrounding the entire Blog, you may add a border style to this part of the template:-

body {
border:1px solid #ff00ff;
}


Read more >>

Add Music to Blogspot blog

This article is updated to address the difference in the way the code is interpreted by the different browsers, namely Internet Explorer and Mozilla Firefox. We have also included a sample music file which you can use to test the effects of adding the sound file to your Blog.“Music, the greatest good that mortals know,
And all of heaven we have below.” ... Joseph Addison

Depending on the subject matter of your blog, having music played in the background may either enhance the pleasure of reading or annoy your visitor. Imagine the agony of surfing the web in discreet, only to catch the attention of your office colleagues or parents when the music automatically blasts off in the background. Not to mention, a big music file may cause a slower page download. Nevertheless, the solution, as shall be explained later, is simple - have an option for the reader to play or stop the music.

To begin, you will need to have a music file uploaded onto a server.Upon uploading, note down the URL of the file.

Alternatively, there are several sites that offer free download of their music files. You can enter search words like “free music download” or search for a popular artist name in the Google search box. Most of the sites that offer free download will lead you to the file location stored in their servers. Copy the URL of the music file that you have chosen.


If you would like to hear how the music works on your Blog, you can also use this music file which we have uploaded onto Google Pages - http://ownlblog.googlepages.com/BalladePourAdeline.mid - whenever you are prompted to enter the “URL of music file”. This file is for testing purposes only. Please do not link permanently to this file as it may be changed or deleted in due course.

Next, you would have to decide how you want the music to be played.

Link for reader to click

This is a text link. Your visitor can click the link if he wants to hear the music.

<a href="URL of music file">Click to hear music file</a>


Remember to enter the URL of music file into the above code. This code can be inserted into your Blog post. If you want to put it in your sidebar, you can go to Template -> Page Elements -> Add a Page Element, select HTML/JavaScript and insert the code. Whatever words you type into the “Click to hear music file” will appear as the text link.

Music with a console

A music player console with controls of the volume, on and off buttons, would give your visitors a choice on how he wants the music played. With the code stated below, the music will not play unless the visitor clicks the play button.

You can either insert the music console into your Blog post or your sidebar. If you want it in the sidebar, go to Template -> Page Elements -> Add a Page Element, select HTML/JavaScript.

The code to insert is this:-

<embed autostart="false" height="40" loop="true" playcount="2" src="URL of music file" width="300"/></embed>


For instance, using the following code:-

<embed autostart="false" height="40" loop="true" src="http://ownlblog.googlepages.com/BalladePourAdeline.mid" width="300"/></embed>


this is what you see:-


It will look different in IE and Firefox, depending on the installed plugins.

Note the following attributes and how they work on different browsers:-

1. Insert your URL of music file into the code.

2. The width of the example you see above is "300". If you want it to be embedded neatly into your sidebar, the width should not be greater than the sidebar width. For example, if your sidebar width is 150px, the width of your console should be about 140px.

3. The height would depend on your preference and space constraints.

4. The autostart attribute has two options. If you choose "true", the music will automatically play when your page is loaded. As I have mentioned earlier, this is not a good option unless you are absolutely sure all your visitors would not mind the music. The better option is to state it as "false". If the visitor wishes to hear the music, he can click the play button to start the music.

Note, however, that while it works fine in Internet Explorer, it may not be so in Mozilla Firefox. The default setting for IE is "false" which means the music will not play automatically. The default setting for Firefox is "true", and when we experimented with .wma and .wav files, they automatically played even when we set the autostart to "false". If you are working on the Mac, the default setting for both browsers is "false".

5. The loop attribute indicates whether the music should stop once that particular tune ends. The common attributes are "false" or "true". If the attribute is "false", the music ends after it is played once. If it is "true", the music will automatically loop and continue playing until the visitor clicks the stop button or leaves your site. For short music pieces, you may want it to repeat and choose "true".

For certain versions of Netscape browsers, another attribute that might work is loop="n" where n is a number. If n is 2 for example, the music will play twice and stop. The similar attribute in Internet Explorer is playcount.

6. You can specify the number of times the music is to be played. In the above example, where playcount="2", the same piece of music is played twice before it stops. If you want the music to be played once, you can delete playcount altogether. Note that this only works in Internet Explorer.

Background music to play automatically

For the music to play the moment your page is loaded, the code will have to appear in the HTML document of your site. Note that in so doing, there are no controls for the visitor to choose whether or not to listen to the music, nor options to turn it off. Login to your Dashboard and under “Template”, click “Edit HTML”. Somewhere near the top, after the word <Head>, insert this code:-

<embed autostart="true" height="0" loop="true" src="URL of music file" width="0"/>


Remember to insert the URL of music file into the code. There is no image of a console and readers cannot choose to turn off the music. Use this option with discretion.

Troubleshooting

The sound files can be in any format provided that your browser has the necessary plugin to play that file. Many people have problems playing MP3 files because their Firefox browsers do not have the necessary plugins. To check what your Firefox browser can support, enter this command into your browser:-

about:plugins


It will list all the installed plugins and the media files that can be played. If you need additional Mozilla Firefox add-ons, you can visit their Add-ons Page.


Further reading:


Read more >>

Add Favicon icon to Blogger URL

Have you wondered how these little icons appear next to the web addresses, like the one you see above? When you visit the sites or bookmark them, these icons will make these URLs stand out. These are “Favicons” or “Favorite Icons”.

You would first need to have an icon which you would like to use, bearing the extension .ico format. If you search your hard disk, you might find some icons which are generic. I would suggest that you create one to represent your own unique identity. There are quite a number of free icon editor software which you can download from the net.

As for myself, I went to Download.com site and downloaded a very small program called Imagicon which can transform images into .ico format. I created an image using Photoshop. You can use any image or pictures if you do not wish to create one. Next, run the program. It is rather simple to use. While you can create icons in 2 sizes – 16x16 and 32x32 – I would think a 16x16 icon is preferable since it is readable in most older browsers.

If you do not wish to download any software, you may also try creating an icon online. Just enter the keywords “online icon generator” into your Google search bar, and you should be able to find several programs that you can try.


Once you have created an icon, save it into your hard disk. The next step of attaching the icon is a little tricky. Ideally, all you need to do is to save it in the root directory of your blog site. Nevertheless, there is no way this can be done. For one, if you try to upload an icon image, Blogger will reject it. Two, any file that is uploaded will not go into the Blogger root directory.

The only method to use will be to upload the icon into some web folder, and create a link.Once you have done that, take note of the URL of your icon. If you are using Google Page Creator, hovering your mouse over the link, you will see that the file is stored under a directory which looks like this http://yourname.googlepages.com/iconname.ico
where “yourname” is your Gmail account name, and “iconname” is the file name. Copy this URL.

Go back to your Blogger dashboard and under the Template tab, go to “Edit HTML”. Near the top you will see a line like this:-

<title><data:blog.pageTitle/></title>


Update:

Copy and insert the following code below the line:-

<link href='URL of your icon file' rel='shortcut icon' type='image/vnd.microsoft.icon'/>


Inserting this will also work but the former is preferred:-

<link href='URL of your icon file' rel='shortcut icon' type='image/x-icon'/>


Remember to type in the “URL of your icon file”.

Save the template. When you refresh your blog site, you should see your nice little Favicon next to the blog address.

Other image types

The .ico image format has been used by many but you can also create an image under the .png or .gif format. Ensure that the size of the image is either 16x16 pixels or 32x32 pixels.

If you have a PNG format image, the link to insert is:-

<link href='URL of your icon file' rel='shortcut icon' type='image/png'/>


If it is a GIF format image, the link is:-

<link href='URL of your icon file' rel='shortcut icon' type='image/gif'/>


External Domain

For those who have hosted sites in external domains, insert the link in the root directory as well. Otherwise, you can upload the file into the root directory and name it favicon.ico

As an example, if your domain name is www.domain.com, the URL of the favicon will be www.domain.com/favicon.ico

This method is not preferred but a number of browser versions are able to process the icon. Since we do not have external domains to try out this alternative, you may want to see if it works for you.

Compatibility

While you can see the Favicon in Mozilla Firefox, many have problems seeing the Favicon in Internet Explorer. This is a known problem and has been a sore point with many IE users. In some versions of IE, bookmarking the site will display the Favicon. This is not necessarily so in IE7 that we are using. In fact, when we bookmarked the highly popular search engine sites, their Favicons don't show in our IE bookmarks too although they show well in Firefox. Perhaps this is one more reason to download Mozilla Firefox if you have not already done so.

Read more >>

Add Digg button to Blogger or Blogspot

This is a step-by-step guide to automatically place a real-time Digg count and vote button to every single blog post. Digg is a social content website where your readers or you can submit content to. If you have a good story, members will 'digg' the post and write comments. As a blog owner, you may want to make it easy for and encourage your readers to submit and digg your articles.

Automatic Count and Vote Button

Before you do that though, you would want to take note of the following:-

1. Your blog should be set to save Post Pages. Post Pages are archived blog posts published to their own web page. Each post will have a unique URL, which is required by Digg for the individual posts to be submitted. To verify or enable it, login to your Blogger Dashboard. Under Settings-> Archiving, set the “Enable Post Pages?” to “Yes” and save the settings.

2. This template hack will put a Digg button to every post. You are therefore not able to choose which post you want to include or exclude a button. If you would prefer to have a Digg button added only to some posts, read the later part of this article on “Button for selective posts.”

3. The code reads the URL of the individual blog page and this shall be the URL used for submission of the story to Digg.

Under “Template”, click the “Edit HTML” tab. Block copy the entire HTML code for your site and save it in a text file. You can also click the "Download Template" link. This is one of the two necessary steps whenever you want to change the template. The second step is of course to “Preview” the new changes, and save the changes only when you are satisfied. The backup you have saved in a text file will come in handy when you accidentally click to save the changes without previewing them. With a backup, you can easily restore the template to the prior state if need be.

Add Digg button to Blogger or Blogspot

Click the box next to “Expand Widget Templates”. Scroll about two-thirds down the template to look for the code that reads:-

<p><data:post.body/></p>


If you want the button to show at the top right corner of your post, replace the above code with this.

<div style='float:right; margin-left:10px;'>
<script type='text/javascript'>
digg_url=&quot;<data:post.url/>&quot;;
</script>
<script src='http://digg.com/tools/diggthis.js' type='text/javascript'/>
</div>
<p><data:post.body/></p>


If you would like the button to appear at the end of your post, replace with this following code instead.

<p><data:post.body/></p>
<div style='float:right; margin-left:10px;'>
<script type='text/javascript'>
digg_url=&quot;<data:post.url/>&quot;;
</script>
<script src='http://digg.com/tools/diggthis.js' type='text/javascript'/>
</div>


If you want to have the button at the top left corner of your post, change the alignment.

<div style='float:left; margin-right:10px;'>
<script type='text/javascript'>
digg_url=&quot;<data:post.url/>&quot;;
</script>
<script src='http://digg.com/tools/diggthis.js' type='text/javascript'/>
</div>
<p><data:post.body/></p>


Digg has another compact button. If you insert this code:-


<div style='float:right; margin-left:10px;'>
<script type='text/javascript'>
digg_url=&quot;<data:post.url/>&quot;;
digg_skin=&quot;compact&quot;;
</script>
<script src='http://digg.com/tools/diggthis.js' type='text/javascript'/>
</div>
<p><data:post.body/></p>


You can also change the background color of the button to blend with your site. For example, a code like this:-


<div style='float:right; margin-left:10px;'>
<script type='text/javascript'>
digg_url=&quot;<data:post.url/>&quot;;
digg_bgcolor=&quot;#BDEDFF&quot;;
digg_skin=&quot;compact&quot;;
</script>
<script src='http://digg.com/tools/diggthis.js' type='text/javascript'/>
</div>
<p><data:post.body/></p>


You can insert the color code of your choice into the red portion. For a list of color values to insert, you may refer to the Hexadecimal HTML color code list.

Automatic Count Button in Blog Footer

[Update] This segment is added in response to user's request to have the Digg button in the Blog footer, i.e., after the labels. If you scroll through your template, you will see this chunk of code which gives the labels in your Blog footer.

<p class='post-footer-line post-footer-line-2'>
<span class='post-labels'>
<b:if cond='data:post.labels'>
<data:postLabelsLabel/>
<b:loop values='data:post.labels' var='label'>
<a expr:href='data:label.url' rel='tag'><data:label.name/></a><b:if cond='data:label.isLast != "true"'>,</b:if>
</b:loop>
</b:if>
</span>
</p>


If you want a Digg button to appear just after the labels, add the appropriate Digg button code right after the above code. For example, if you want the compact Digg button, add this code below the labels code:-


<div style='float:right; margin-left:10px;'>
<script type='text/javascript'>
digg_url=&quot;<data:post.url/>&quot;;
digg_skin=&quot;compact&quot;;
</script>
<script src='http://digg.com/tools/diggthis.js' type='text/javascript'/>
</div>


Move the Digg button code above the labels if you'd like. Experiment a little. Just remember to preview the template and not to save it unless you are satisfied.

Digg Button in Blog Footer

If you do not want to see an Automatic Count button, you can also place a link button into the template. This button will appear at the bottom right corner of every post and readers can click it to submit that post to Digg.

Scroll to this part of the template and insert the lines (in red):-

<div class='post-body'>
<p><data:post.body/></p>
<div style='clear: both;'/> <!-- clear for photos floats -->
</div>

<div style="float:right; margin-left:10px;">
<a expr:href='"http://digg.com/submit?phase=2&amp;url=" +
data:post.url + "&amp;title=" + data:post.title'
target='_blank'><img border="0" alt="Digg this" src="http://digg.com/img/badges/91x17-digg-button.gif"/></a></div>


You can change the position of this button. Go through what we discussed earlier in this article to understand where to place the code if you should want the button to be at the top of the article.

The button 91x17-digg-button.gif is simply an example. As the following section explains, there are many buttons you can use. To change the button to another design, replace the image URL with that of the new button.

Button for selective posts

The methods of manually adding a Digg button to selective posts are rather tedious and complicated. The problem is that Blogger does not allow you to simply insert a JavaScript into a blog post. Since this blog is targeted at the majority of us who are not computer experts, I shall suggest a method that I think is simple enough for us.

First, go to the Digg tools site to select a Digg button that you like. You will see a wide selection of Digg buttons.

Digg Digg Digg Digg Digg Digg

Digg Digg Digg Digg

Digg

Take note of the image URL. For example, the image URL of this button Digg is

http://digg.com/img/badges/91x17-digg-button.gif


Write a post and publish it. Next, refresh the page and click on the title of your post. This will bring you to the post page. Take note of the new URL of your story. Insert it into the orange portion of this HTML code. If you want a different image, insert the image URL into the blue portion of the code.

<a href="http://digg.com/submit?phase=2&url=URLofyourstory" target="_blank"><img border="0" alt="Digg my article" src="http://digg.com/img/badges/91x17-digg-button.gif"/></a>


Now, go back to your article and Edit it. Choose the “Edit HTML” mode and not “Compose” mode. Copy the above code and paste it into whichever part of your blog article. “Preview” it, and if you are happy with it, “Publish” it.

For this article, I have manually inserted the Digg button.
Read more >>